User Guide
Running Paracon
Paracon is a TUI application, which is to say it has a Text User Interface, and runs in a terminal window. It is packaged as a zipapp, which is a self-contained Python application. This makes running Paracon extremely easy. As long as you have a suitable version of Python installed on your system, simply open a terminal window (Command Prompt or PowerShell on Windows), change directory to a suitable location for your configuration and log files, and enter:
$ python3 <path-to-pyz-file>/paracon_<version>.pyz
Depending upon your particular system, you may need to substitute python
for python3 in the above command line, and of course backslash for slash
if you are running on Windows.
On Linux and Mac, you can make the file directly executable, so that if you have placed it in a directory that is on your path, you can simply type:
$ paracon_<version>.pyz
To enable this, you will need to set the necessary file permission using:
$ chmod u+x paracon_<version>.pyz
Paracon will create its configuration and log files in your current directory when you start it, not the directory in which the .pyz file is located, so you should start it from wherever you would like these files to be created. (However, see Settings for information on alternative locations.)
The first time you start Paracon, you will see the Setup window.

Here you will enter the host and port of your AGWPE server (e.g. Direwolf), along with the default callsign that Paracon should use to identify you.
Paracon will remember the information you enter here, so that when you start the application on subsequent occasions, it will use this automatically. If you need to change it later, you can bring up the Setup screen again.
Once you are successfully connected to the server, you will notice that the host and port are displayed at the top right of the Paracon window.
Connections
Once connected to your server, you’ll see the Connections window.
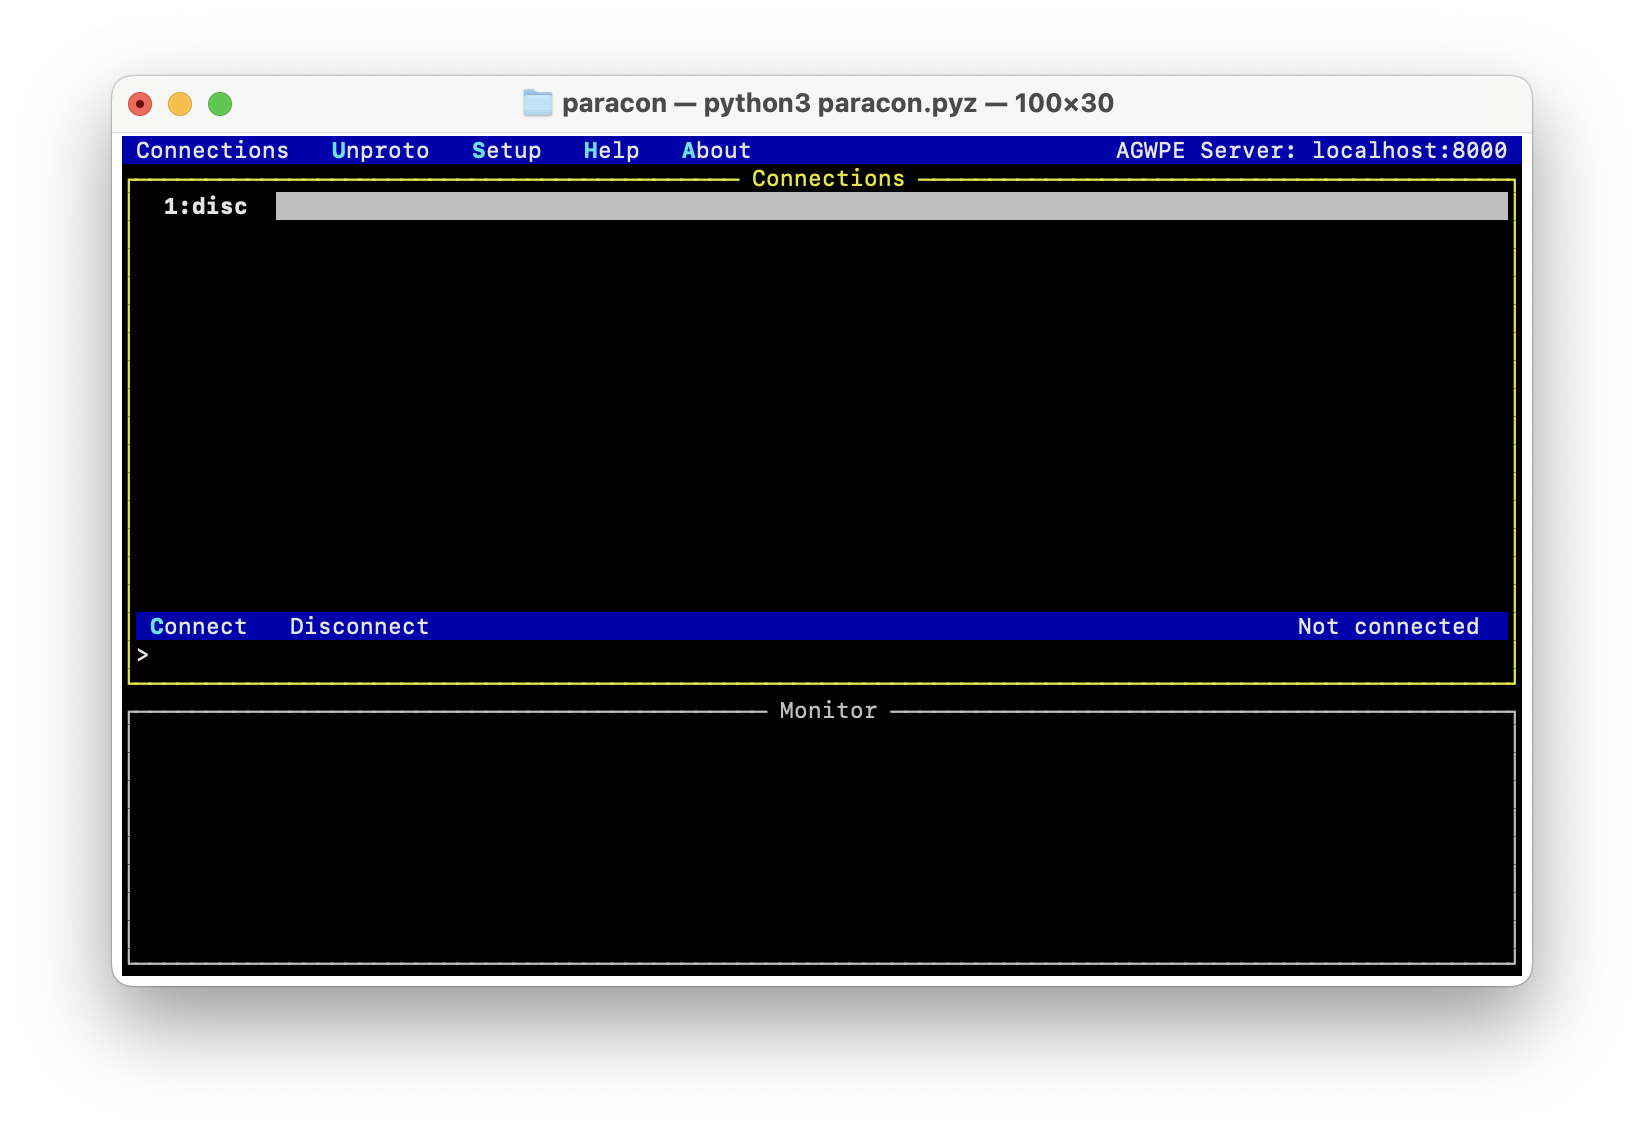
This is where you can open connected-mode sessions to remote systems. You can open up to 9 simultaneous connections, each in its own tab. That ‘1:disc’ in the above screenshot indicates that tab #1 is currently disconnected.
To start a new connected-mode session, use the Connect command to bring up the Connect dialog.
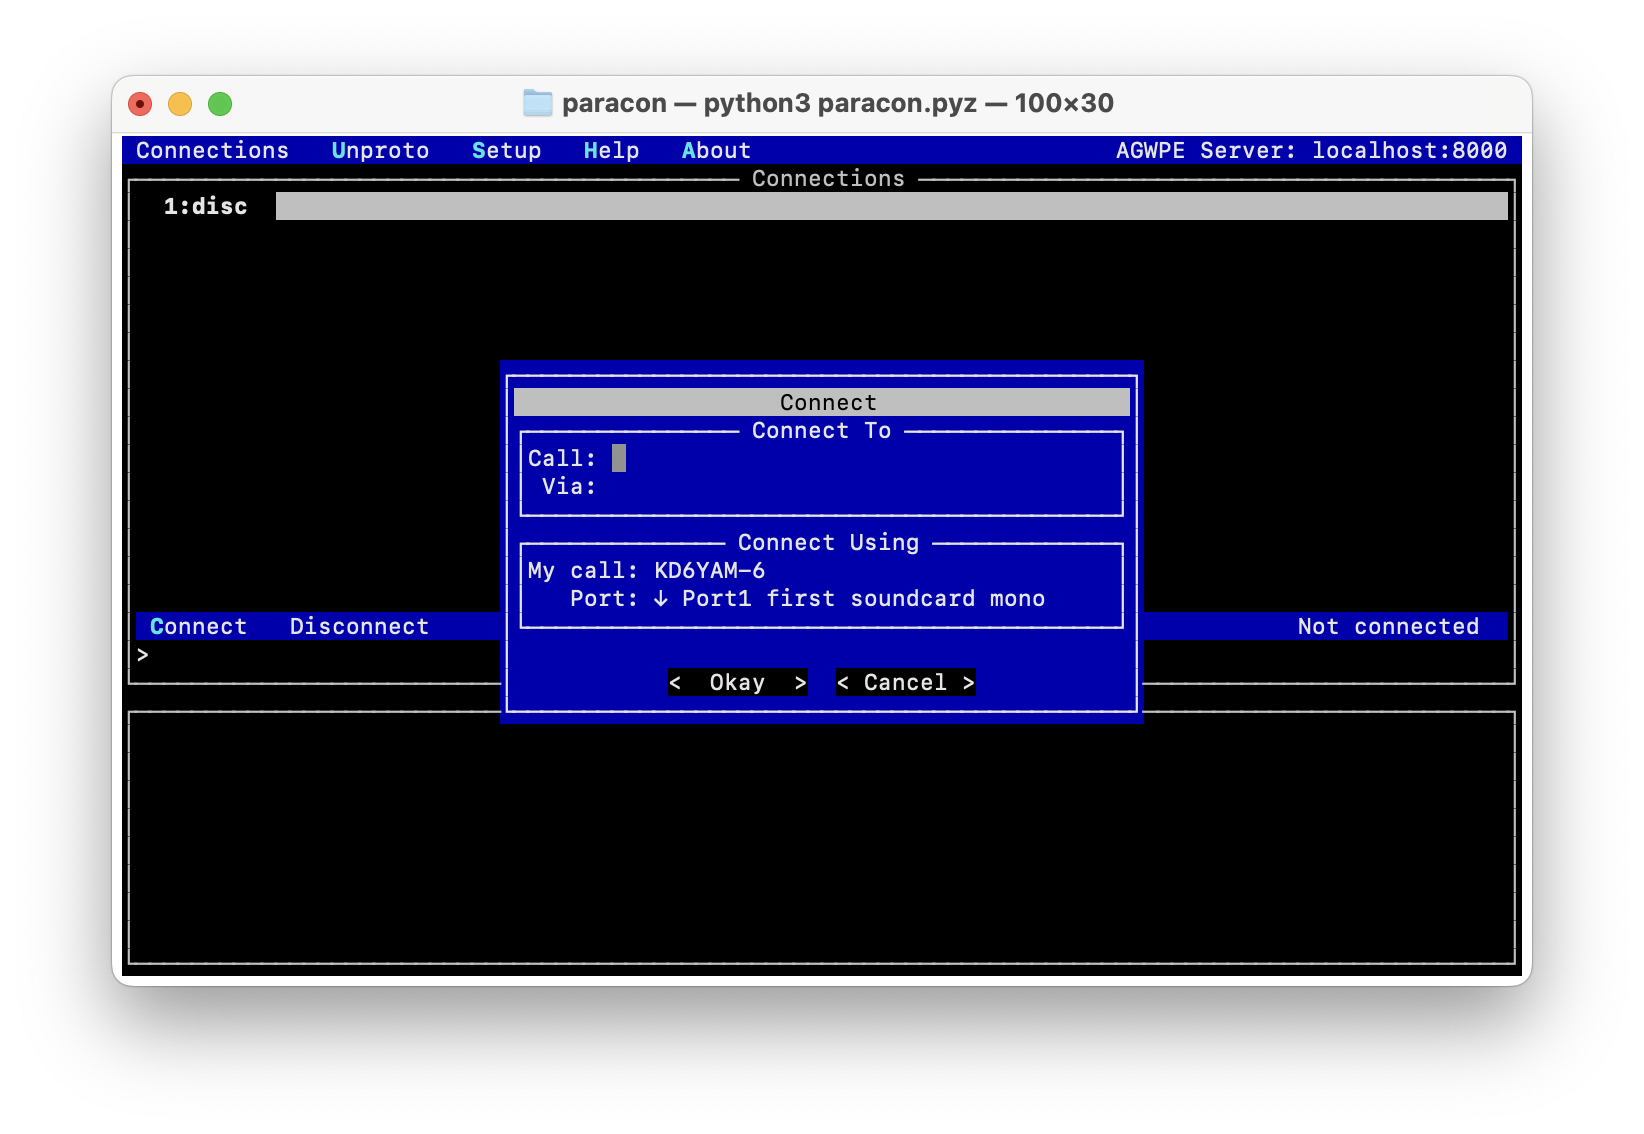
Enter the callsign of the station to which you wish to connect, and any ‘via’ you might need in order to reach it. (If you need to enter multiple ‘via’ values, separate them with commas.) The ‘My call’ field will initially show the callsign you entered at Setup time, but you can, of course, change it if desired.
The ‘Port’ field is a drop-down list of the available AGWPE ports on your server. Click on the down-arrow to open the list. In many cases, you will have only one available port, and can leave this field as it is. If your server provides multiple ports, you can select the appropriate one here.
Once you select ‘Okay’, Paracon will attempt to make a connection. Once it has connected, your screen will change to something like the following.
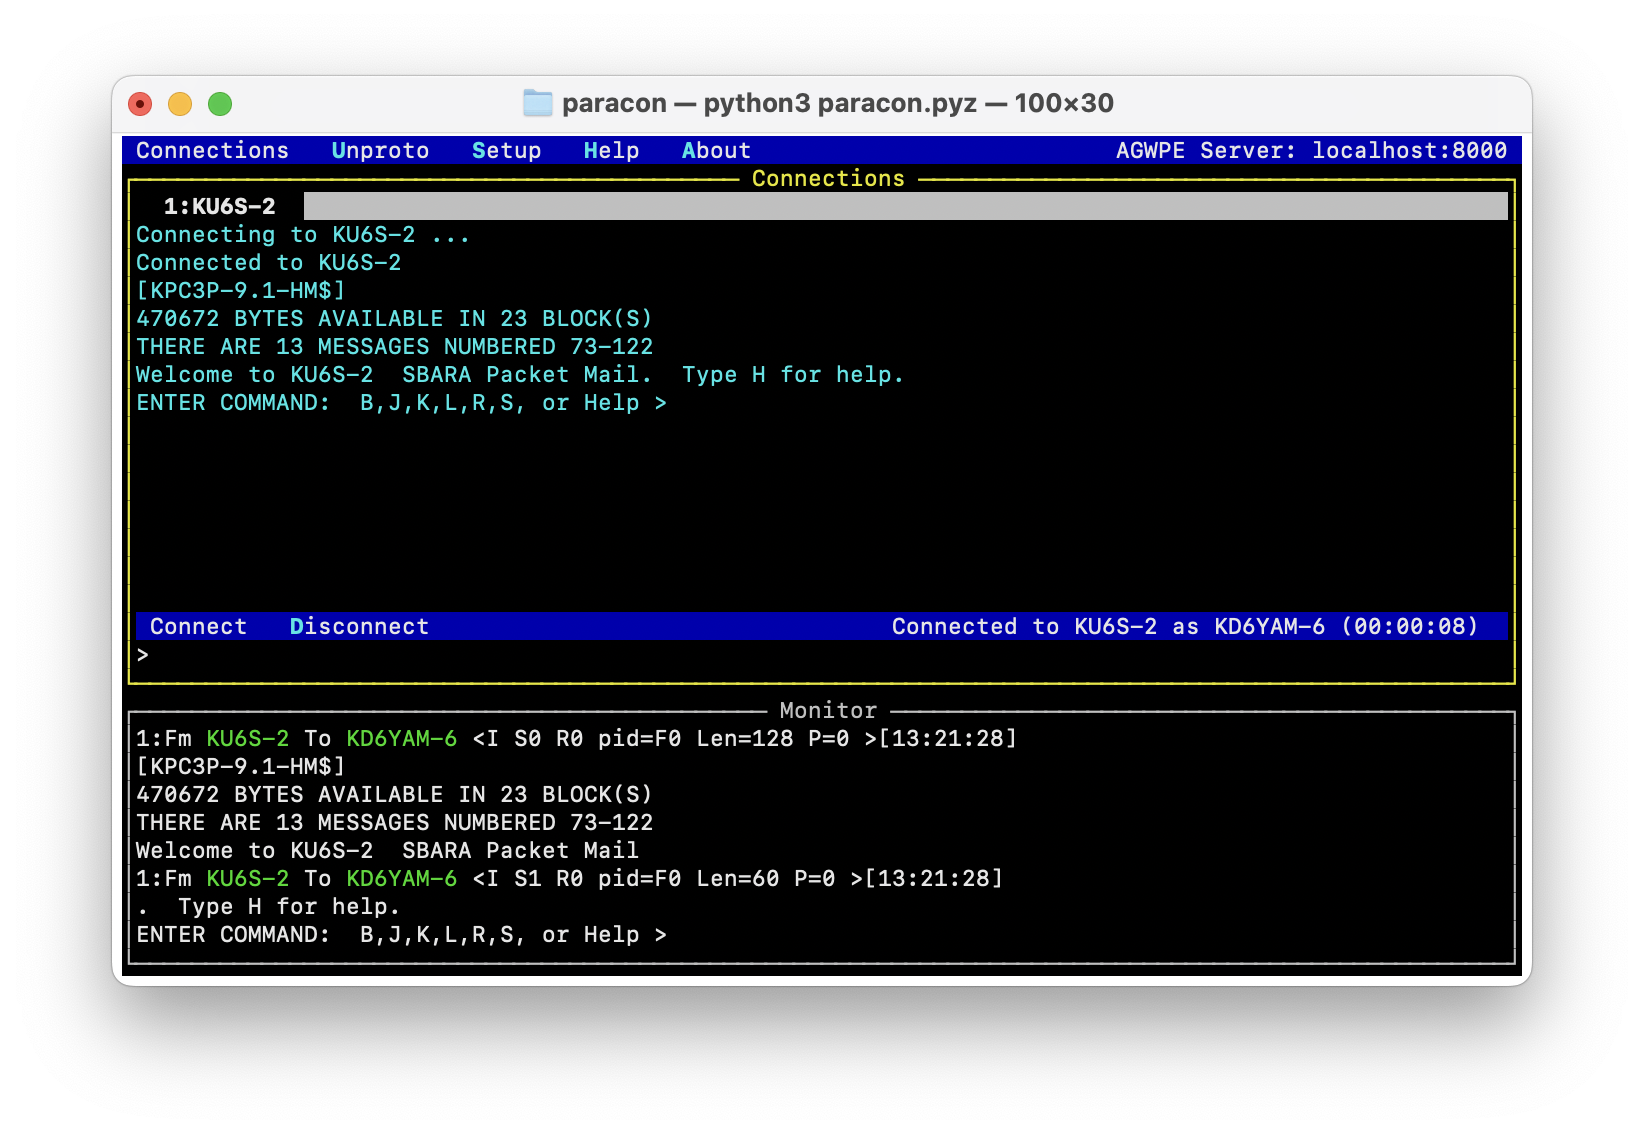
As you can see, several things have been updated to reflect the new connection:
The tab title now shows the callsign of the remote system to which you are connected.
The connection status indicator on the bottom right of the Connections panel shows the details of your connection, including its duration.
The ‘Connect’ command has been disabled, and ‘Disconnect’ has been enabled instead.
The tabbed panel for this connection shows Paracon’s status as it makes the attempt to connect, and then successfully connects. All of the traffic on this connection, both incoming from the remote system and whatever you send to that system, is also shown in this panel.
The Monitor panel shows all traffic seen on the AGWPE port. This includes the traffic from your connected-mode session, and also any other traffic seen on the same frequency.
Managing connections
As mentioned above, you can open up to 9 simultaneous connections in Paracon. To add a new connection, you simply create a new tab (using Alt-+ or Alt-t), and connect to your new destination just as you did in the scenario described above.
When you have multiple connections, you can switch between them with their tab numbers (using Alt-<tab-number>).
When you are finished with a tab, you can either leave it open for future reuse, or close it (using Alt-- or Alt-r) to remove the clutter.
Unproto
Switching from the Connections window to the Unproto window, you’ll see a large panel with the same content that you saw in the Monitor panel in the Connections window, but here you have the opportunity to send Unproto (or unconnected) messages too.
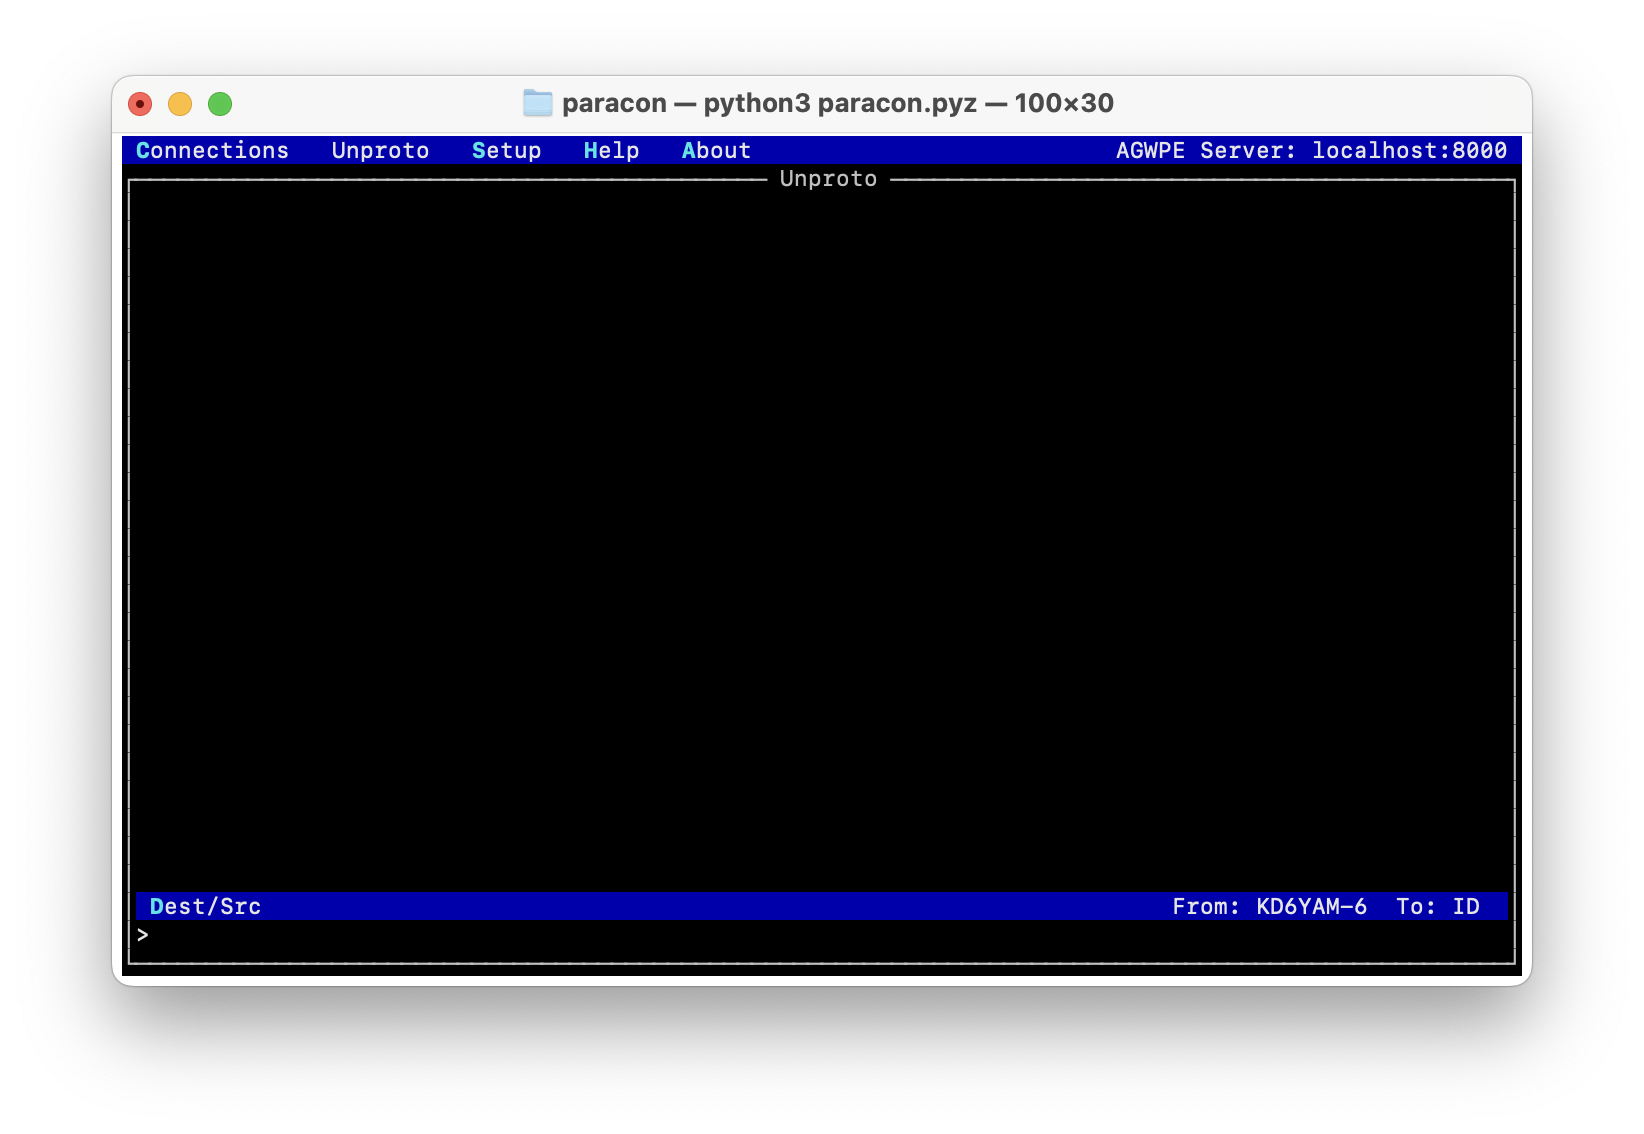
Whatever you enter on the text entry line at the bottom will be sent out when you hit the Return or Enter key.
The indicator on the bottom right shows the current configuration that will be used for each message sent. To change this, use the Dest/Src command to bring up the Unproto dialog.
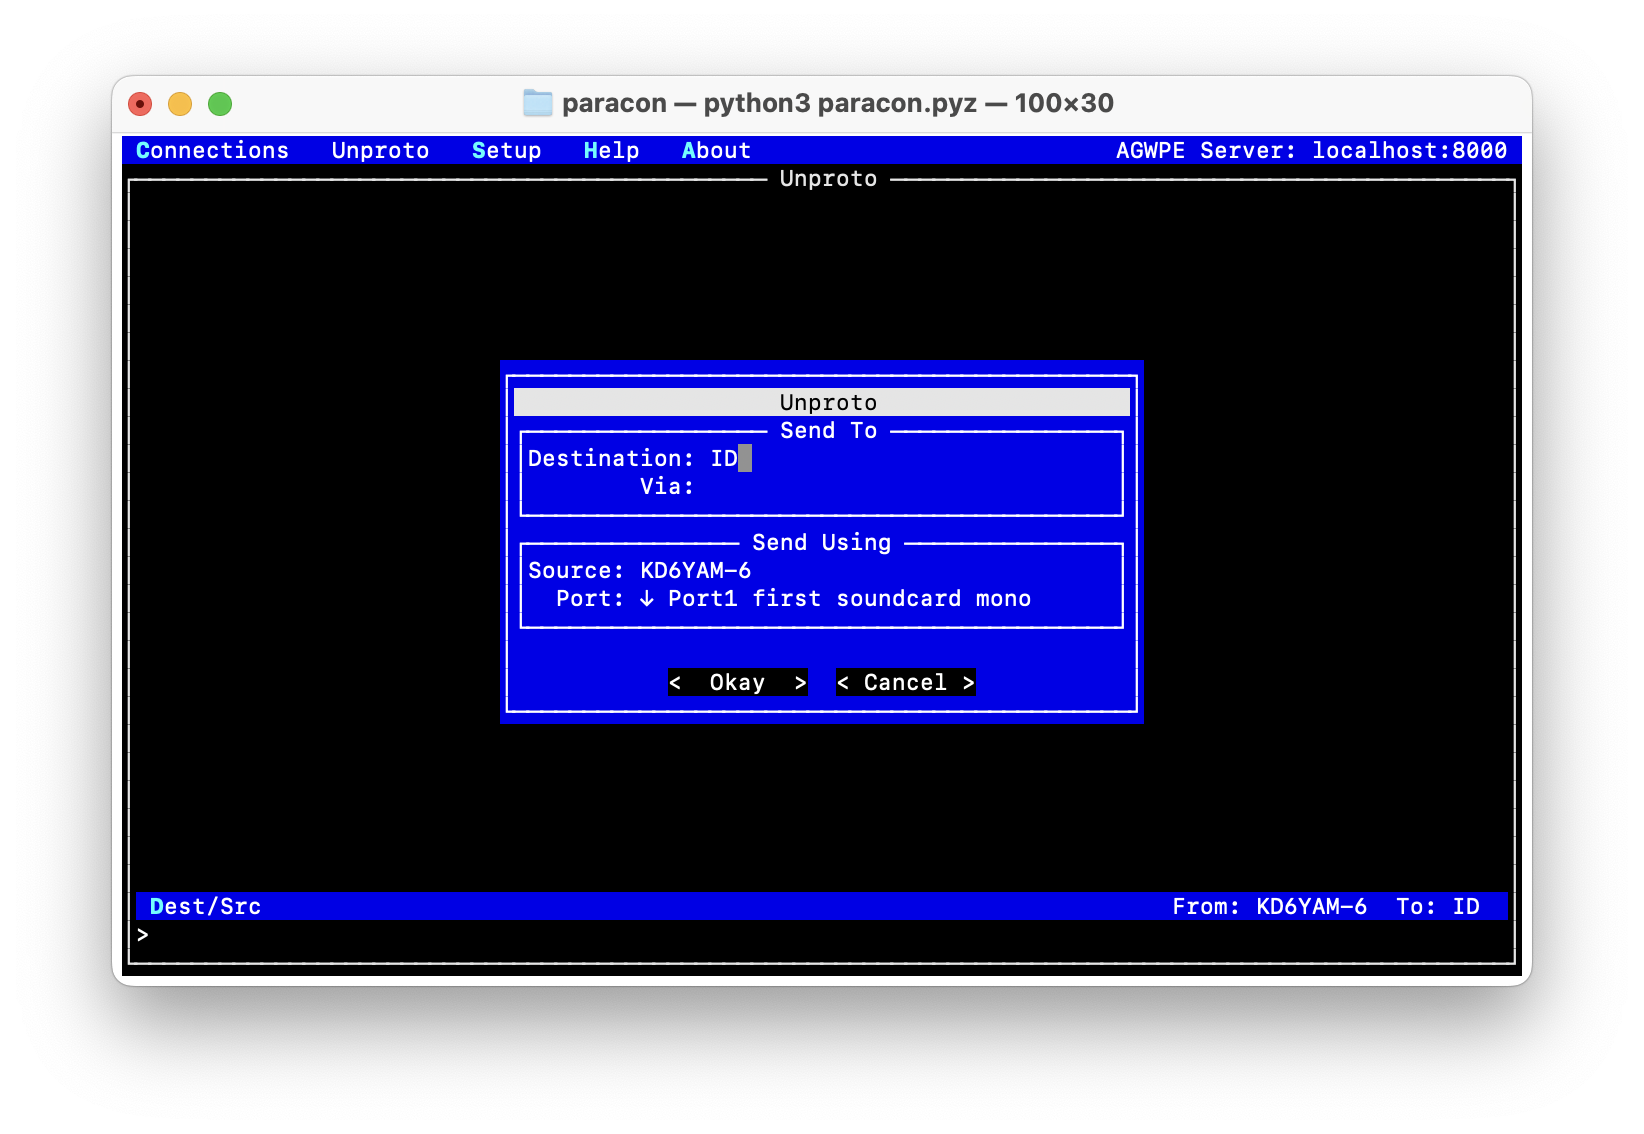
The ‘Destination’ field will initially show ‘ID’, but you should change this depending upon your intended use of Unproto mode. (For example, if you are participating in a net, it might be the callsign being used for that net.)
As with the Connect dialog, if you need to enter multiple ‘via’ values, separate them with commas.
The ‘Source’ field will initially show the callsign you entered at Setup time, but you can, of course, change it if desired.
The ‘Port’ field is a drop-down list of the available AGWPE ports on your server. Click on the down-arrow to open the list. In many cases, you will have only one available port, and can leave this field as it is. If your server provides multiple ports, you can select the appropriate one here.
Settings
Paracon will remember the information you enter in the Setup, Connect and Unproto Dest/Src dialogs. When you bring up one of these dialogs, it will initially show whatever values you had last entered.
These settings are saved, by default, in a text file named paracon.cfg in your current directory when you started Paracon. Should you get into a confused state at any time, you may simply delete this file. The next time you start Paracon, it will start fresh with the Setup dialog.
If you need to maintain multiple Paracon configurations - perhaps different setups for different servers, for example - you can do so simply by starting Paracon from a different directory for each configuration. Alternatively, you can specify the location of separate configuration files on the command line, when you start Paracon. See Command-line options below.
Conversely, if you wish to share the same configuration file regardless of where you start Paracon, you can move your paracon.cfg to your home directory after Paracon initially creates it, and Paracon will find it there.
Text encodings
When connected to a remote site (e.g. a BBS), Paracon interprets the text it receives as UTF-8 encoded. In the overwhelming majority of circumstances, this works as expected. However, on very rare occasions, content may be received that was encoded using a different, non-compatible encoding. An example is old line drawings created using the original IBM PC character set.
To allow for this, Paracon will try an alternate decoder if UTF-8 decoding fails on a given line of text. If the alternate also fails, Paracon will revert to UTF-8 but using the standard Unicode replacement character (�) in place of any problem characters.
Why not allow for multiple alternate decoders? The problem is that it is not possible for Paracon to determine which alternate is the correct one, because the same character code may be a valid character in more than one alternate. As an example, the degree symbol (°) in the old Windows encoding is a light shaded box (░) in the original IBM PC encoding. The same character code (i.e. byte value) is valid in both encodings, but the characters themselves are different.
By default, the alternate decoder is that for cp437, which is the
aforementioned original IBM PC encoding. It is possible to change this if you
know for certain that you will be receiving content in a different encoding.
To specify a different alternate, you need to edit your paracon.cfg file and
add an entry like the following:
[Connect]
decode_alt = cp1252
This example specifies that the old Windows encoding, cp1252, should be
used as the alternate decoder instead of the default cp437.
Command-line options
The default locations of the Paracon configuration and log files may be overridden via command-line options, as follows.
- -c, --config CONFIGFILE
The full path to the configuration file used to save settings. If this file does not yet exist, Paracon will create it when new settings are saved.
- -l, --logdir LOGDIR
The full path to the directory in which Paracon should create its log files. If this directory does not exist, Paracon will create it on startup.
- -V, --version
Print out the Paracon version and exit.
Logging
Paracon maintains a number of log files. By default, these are located in your current directory when you start Paracon. Alternatively, you can specify a log directory on the command line, when you start Paracon. See Command-line options above.
- paracon.log
Contains information about any errors that have occurred during the execution of Paracon.
- monitor.log
Contains the same information as the Monitor and Unproto panels. This is preserved across Paracon sessions, making it easy to refer back to older data.
- <call-from>_<call-to>.log
Contains the exchange that occurs during a connection between the two stations of the filename. This is the same information that you see in the connection tab during a connected-mode session.